一.文件组成
background.js 后台文件,从安装插件后开始生效
content-script.js 每一个网页载入后都会执行一个content-script.js
popup.js 点击浏览器地址栏的html中引入的js
popup.html 点击浏览器地址栏的html
popup.css 点击浏览器地址栏的html引入的css
./icon.png 本地的图片
manifest.json 浏览器插件的文件配置
关于manifest.json的配置详情
{
    "manifest_version": 3,//目前新版chrome使用版本3就可以了
    "name": "插件名称",
    "version": "1.0",//插件版本号
    "description": "插件描述",
    "author": "xx",//开发人员
    "icons": {
        "16": "./icon1.png",//本地的图片.选择三个大小尺寸的
        "48": "./icon2.png",
        "128": "./icon3.png"
    },
    "action": {
        "default_icon": "./icon1.png",
        "default_title": "",
        "default_popup": ""
    },
    "background": {
        "service_worker": "./background.js"//后台文本配置
    },
    "permissions": [//允许插件的权限
        "contextMenus",//菜单
        "storage",//缓存
        "tabs",
        "activeTab",
        "notifications"//通知
    ],
    "web_accessible_resources":[
        {
            "resources": [ "/save.html" ],//点击浏览器地址栏弹出的html,原本为popup.html,这里我重命名了
            "matches": [ "https://*/*" ],//点击浏览器地址栏匹配的网站
        }
    ],
    "content_scripts": [{
        "matches": [
            "http://*/*",
            "https://*/*",
            "https://*/*/*",
            "http://*/*/*",
            "<all_urls>"
        ],
        "run_at": "document_idle",
        "js": [
            "./content-script.js"
        ]
    }]
}
二.基础使用
1.content-script.js的使用
i.鼠标右键操作
document.addEventListener("contextmenu", async function (event) {
    var e = event.target;
    console.log("e",e)
});
可以进行判断鼠标右键的dom元素
i. 拖拽元素
document.addEventListener('dragstart', function (event) {})
document.addEventListener('dragover', function (event) {})
document.addEventListener('dragend', function (event) {})
i.设置拖拽过程中的图片大小
//首先创建一个dom
addDragImage()
function addDragImage() {
    var dragImage = document.createElement("img");
    dragImage.style.position = 'fixed';
    dragImage.style.width = "110px";
    dragImage.style.top = "-999999px";
    dragImage.style.zIndex = -99;
    dragImage.setAttribute("id","dragImage");
    document.body.appendChild(dragImage);
}
//其次 当前获取到图片src(例如为:text.png)设置拖拽图片(注意需要在拖拽前获取)
1.var dragImage = document.getElementById("dragImage");
  dragImage.src = text.png;
data.dragCustomImage = dragImage;
2.event.dataTransfer.setDragImage(data.dragCustomImage, 0, 0)(在dragstart中调用)
i.发出通知
可以发给background.js,也可以发给popup.js
chrome.runtime.sendMessage({
   msg: "xxx",
   type: "xx"
}, function(response) {
   console.log("response from popup: ", response);
});
i.接收通知
接收信息:只能接收background.js传来的信息,因为每个页面有个特有的pageId
chrome.runtime.onMessage.addListener((receiveData, pluginInfo, sendResponse) => {
    //receiveData是传的参
    console.log("data:", JSON.stringify(receiveData));
    //需要响应信息,不然会报错
    sendResponse("content已接收到点击右键插件的告知)
})
2.background.js的使用
i.创建右键菜单
chrome.contextMenus.create({
    title: '插件名字',
    id: 'picwell',
    contexts: ['all'],//指定右键什么的时候显示插件
    type: "normal", // "normal", "checkbox", "radio", "separator"
},res=>{
    console.log("创建菜单",res)
});
i.点击浏览器地址栏插件图标事件
chrome.action.onClicked.addListener(function(tab) {
    console.log("插件图标被点击了!",tab);
});
i. 获取popup.html的url
chrome.runtime.getURL("/popup.html")
i.鼠标右键菜单事件
chrome.contextMenus.onClicked.addListener(function (menuInfo, tabInfo) {
   if (menuInfo.menuItemId === "新插件id") {
      console.log("点中了新加的插件")
   }
});
i. 接收通知
可以接收来自content-script.js和popup.js的通知
chrome.runtime.onMessage.addListener(function (request, sender, sendResponse) {
    console.log("background获取request",request)
    sendResponse("bkgd receive")
})
i.发送通知
可以发送给content-script.js和popup.js的通知
//如果发送给content-script.js,需要先查询pageId
chrome.tabs.query({ active: true, currentWindow: true }, function(tabs) {
   console.log("tabs",tabs)
   chrome.tabs.sendMessage(tabInfo.id, {
       msg: "xx",
       type: "xx",
       id:tabInfo.id
    },
    (res) => {
       console.log(res)
    })
 });
//如果发送给popup.js,不需要发送指定id
chrome.runtime.sendMessage({
   msg: "xx",
   type: xx,
 }, (res) => {
  console.log(res)
 });
}
i.获取当前插件的版本号
chrome.runtime.getManifest().version;
i. 存入缓存
background.js和content-script.js都适用
chrome.storage.local.set({
   dragData: xxx
}, function () {});
i.取出缓存
background.js和content-script.js都适用
chrome.storage.local.get('dragData', function (result) {})
3.popup.js的使用
i.若想点击popup.html中某处跳转扩展程序页
1.不能直接location.href跳转,需要现在本地创建test.html,然后window.location.href=’./test.html’
2.test.html引入test.js
3.test.js中chrome.tabs.create({ url: “chrome://extensions/” });
i.发送通知
可以发送给background.js,不能发送给content-script.js,因为content-script.js需要pageId
chrome.runtime.sendMessage({ event: "xxx"},(res)=>{
    console.log("res",res)
})
i.接收通知
可以接收background.js和content-script.js的通知
chrome.runtime.onMessage.addListener(function(request, sender, sendResponse) {
    console.log("popup获取request", request);
    sendResponse("收到")
});
注意:只有popup.js和content-script.js可以发送ajax请求,background.js不能发送ajax请求
4.调试
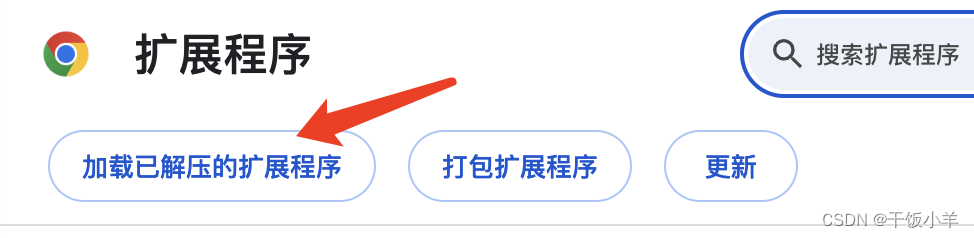
打开谷歌浏览器管理扩展程序页面,点击加载已解压的扩展程序,选中自己开发的chrome插件包,
之后重新打开浏览器,或者刷新浏览器页面,新的chrome插件就可以生效啦.

